Transform your bedroom into a work of art with a DIY wood slat accent wall! Learn how to create a stunning, eco-friendly focal point perfect for any style. Discover tips on going from partial to full wall coverage and why a satin black finish is the ultimate modern touch.
Getting Started on Your DIY Bedroom Accent Wall
We’ve all been there. You stare at a blank canvas (or, you know, an actual blank wall) and wonder: what will truly tie this room together? While framed prints and tapestries are classic solutions, have you considered the ever-so-slightly-meta approach of making the wall itself the art? We’re talking about accent walls! And not just any accent walls, but trendy, eco-friendly, and totally customizable wood slat accent walls.
Wood slat walls are having a major moment, and they’re the perfect way to add a touch of drama and dimension to your bedroom. Plus, they’re surprisingly achievable, even for DIY novices. So, if you’re searching for “bedroom accent wall ideas” or “wood wall accent ideas,” this home renovation blog post is for you!
Eco-Friendly Wood Strip Material
Reclaimed wood is an excellent choice for an eco-friendly wood strip accent wall. This material repurposes old wood from structures like barns, fences, or pallets, giving it a new life and reducing waste.

Here are some other sustainable options:
- FSC Certified Wood: This certification ensures the wood comes from responsibly managed forests.
- Bamboo: A rapidly renewable resource, bamboo is a strong and durable alternative to traditional wood.
- Recycled Plastic Wood: Made from recycled plastic, this material offers a unique look while being environmentally friendly.
Pro Tip: When selecting wood, consider the thickness and width needed for your desired geometric pattern.
Creating a Pattern Layout for your Wood Slat Accent Wall
Before diving into the world of power tools and woodcuts, it’s crucial to meticulously plan out your wood slat accent wall design. A well-defined layout ensures a flawless final product, minimizing material waste and frustration. Here’s a breakdown of the process to create a pattern layout for your wood slat accent wall:
Choose your Pattern:
The first step is to select a geometric pattern that complements your taste and the overall vibe of the space. There are hundreds of bedroom wall accent ideas on the internet. Try to narrow down your choice of pattern first, and then search for design inspiration images that will help you create your personalized bedroom wall art.

Here are popular choices for wood slat accent walls:
- Classic Patterns:
- Herringbone: This timeless design features interlocking slats that create a zigzag pattern.
- Chevron: Similar to herringbone, but with a more angular look.
- Grid: A clean and modern pattern that creates a strong visual impact.

- Contemporary Patterns:
- Diagonal Lines: Create a dynamic and eye-catching design by arranging slats diagonally.

- V-Shape: A bold and unique pattern that adds drama to the room.
Measure your Wall:
Accurately measuring the wall’s dimensions (width and height) is essential for calculating the total number of wood slats required and determining the slat layout.
Plan the Layout on Paper:
Sketch a scaled representation of your accent wall on graph paper. This allows you to visually experiment with different slat arrangements and ensure the pattern aligns perfectly with the wall’s edges.
Calculate the Number of Slats:
Once you’ve finalized the layout on paper, calculate the total number of wood slats needed. For my design, I knew I was going to use 1″ wood slats, so I used 1″ wide blue painter’s tape to help lay the pattern on the wall. From there, calculating the total length required in slats was fairly easy. Consider factoring in a little extra for potential miscuts or imperfections during installation.

Determine Slat Starting Points:
For some patterns, like herringbone or chevron, you’ll need to identify the starting points for each slat on the wall. This ensures the pattern sequences correctly.
Pro Tip: Online pattern layout generators can be a helpful tool for visualizing and creating complex slat arrangements.
Materials and Estimated Costs for Your Wood Slat Bedroom Accent Wall
Before you dive into your wood slat project, let’s break down the materials you’ll need and a rough estimate of costs.
- Wood ($50-$200 depending on wood type, quantity, and size):
- Type: Consider pine, oak, or poplar for their affordability and workability.
- Dimensions: 1×2 or 1×3 inch boards are commonly used for slats.
- Quantity: This will depend on the size of your accent wall.
- Adhesive, filler, sandpaper, stain/paint: $50-$100
- Nails, level, measuring tape, saw: $30-$50
Total estimated cost: $150-$450
Essential Tools for Your Wood Slat Project
Having the right tools on hand will make your wood slat project much smoother. Here’s a list of what you’ll need:
Hand Tools:
- Hammer: For securing nails.
- Level: To ensure even placement of slats.
- Measuring tape: For accurate measurements.
- Pencil: For marking cut lines.
- Sandpaper: For smoothing wood surfaces.
Power Tools (optional but helpful):
- Nail gun: Significantly speeds up the installation process.
- Miter saw or circular saw: For precise cuts. If you don’t have either of these, you can use a hand saw, but it will be more time-consuming.
- Drill: For pre-drilling holes if needed.
Pro Tip: Alternative to Miter Saw: Miter Box
If you don’t have a miter saw, a miter box can be a helpful tool for making accurate angled cuts in your wood. It’s a simple, inexpensive tool that can be used with a hand saw.

By gathering these tools before you start, you’ll be well-prepared to tackle your wood slat project with confidence.
From Partial to Full Commitment: Embrace the Flexibility of Wood Slats
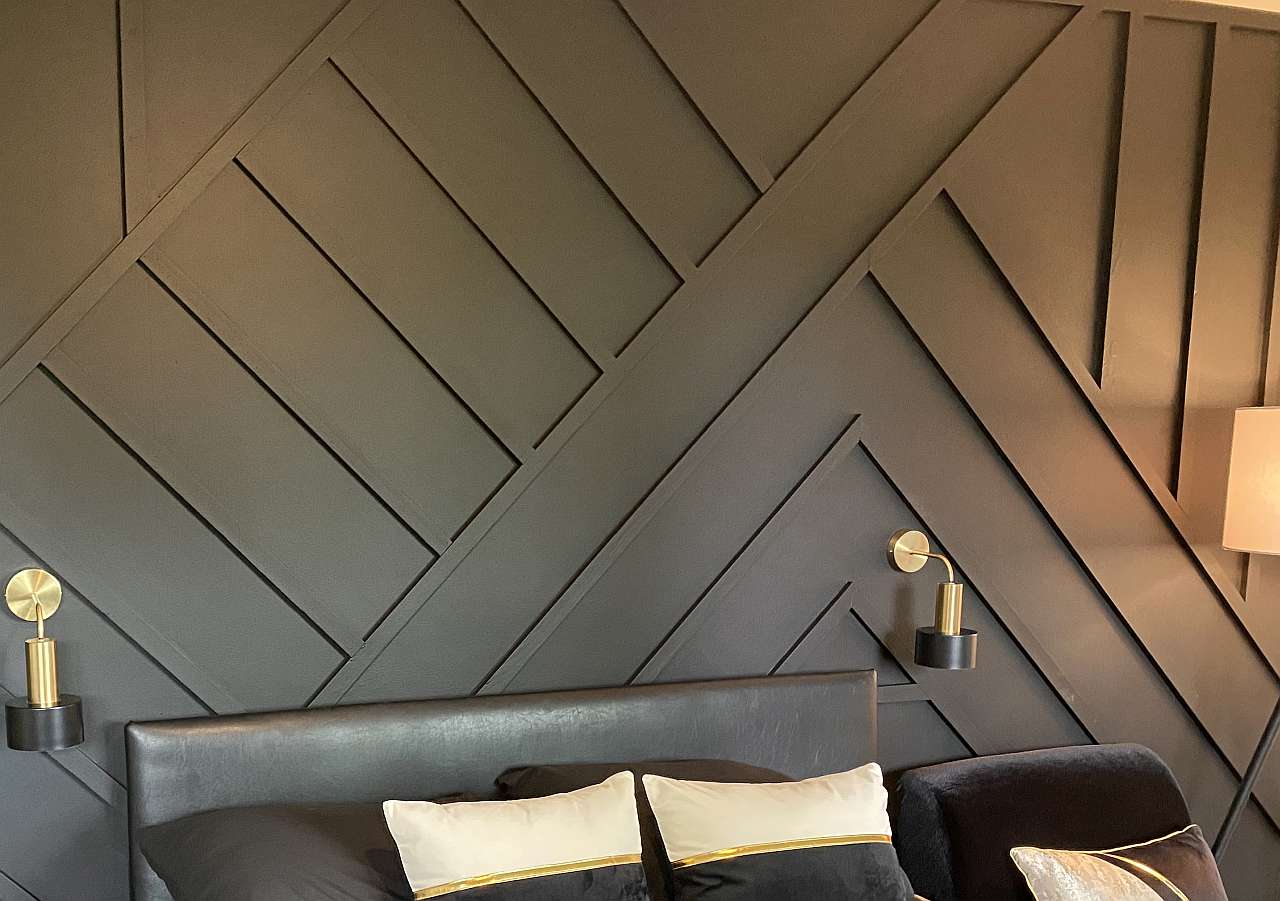
We get it. Maybe you’re initially drawn to the idea of a partial wood slat accent wall, say behind the bed or flanking a nightstand. Our guest bedroom accent wall was originally intended to be a “headboard” of sorts, and then we decided to continue the pattern on the remainder of the accent wall.


The beauty of wood slats is their versatility. Here’s the lowdown on embracing the full-wall look:
- Visual Impact: A full accent wall makes a bold statement. It adds depth and texture to the space, drawing the eye and grounding the room.

- Cohesive Design: A full wall treatment ties everything together. It creates a unified aesthetic, especially if you’re using reclaimed or sustainable wood that complements your existing furniture or flooring.
- Flexibility is Key: Don’t worry, going full-on wood slat doesn’t have to feel permanent. You can always paint the wall (or the slats themselves!) a different color down the line if you ever crave a change.
Pro Tip: When it comes to painting your wood slat accent wall, consider a dramatic, dark shade like satin black. It creates a chic, modern look that pairs well with a variety of bedding and decor styles. Plus, it highlights the beautiful geometric pattern of the wood slats.
Conclusion
With a little planning and the right tools, creating a stunning wood slat accent wall can be a rewarding and budget-friendly DIY project. Remember, safety first! Always wear protective gear when using power tools. And don’t forget to explore other eco-friendly and affordable home renovation ideas to transform your space. For more inspiration and practical tips, check out our weekly home renovation blog, Eco-Luxe Living: Hawai’i. Let’s create beautiful, sustainable homes together!

